Showing posts with label crafts. Show all posts

Mar 16, 2012

Homemade Finger Paint {Something Fun Friday}

Grace and I read a Fancy Nancy book about the aspiring artist, so Grace has been begging me to paint.  I didn't have any paint, so I googled "homemade finger paint" and found this recipe from I Can Teach My Child.  It whipped up in less than 5 minutes, and the girls had a ball!

The recipe made about two cups, so I left half of it untinted and popped it in the refrigerator for another day.  Of which I am sure there will be one.  Grace is already asking to do it again.

 A clean palette


 Mm-mmm.  Tasty.

Clean-up sink party!

Mar 15, 2012

Girl's Tutu Skirt {A Tutorial}

Grace is all about princesses and ballerinas right now.  She has been asking me for a poufy skirt, so yesterday during their nap I sewed this up.  It took about 2 hours, but I wasn't being super precise or meticulous.

Supplies for a size 3 tutu skirt:
Fabric: 60" x 19" rectangle (I cut up an old sheet!)
Tulle: 120" x 48" width of the bolt (I have an entire bolt of tulle from my wedding 7 years ago.)
1" wide Elastic: 20" (or measure of the child's waist minus one inch)

  • Cut tulle in half length wise; if the tulle was folded in half on the bolt, just cut along the fold line.  You'll end up with two rectangles approximately 120" x 24".  
  • Fold 1 tulle rectangle in half length wise; you will end up with a doubled piece measuring 120" x 12".
  • Sew a basting stitch along the entire length of the selvages (the open side, not the folded side) and gather till the rectangle measures 60" x 12".  
  • Pin to fabric rectangle so bottom of tulle and fabric are even and sew. (see photo below)
  • Cut remaining tulle rectangle length wise into two more rectangles, measuring 120" x 15" and 120" x 9".
  • Fold each rectangle in half length wise, sew a basting stitch along the length of the selvage, and gather till the length is 60".  One doubled rectangle will measure 7.5" wide, the other will measure 4.5" wide.
  • Pin and sew the gathered 7.5" wide rectangle one inch above the previous tulle layer.
  • Pin and sew the gathered 4.5" wide rectangle one inch above the second tulle layer.
  • With right sides facing, sew the tulle and fabric rectangle along the width.
  • Fold down the top of the skirt 1.5", forming a casing.  Leave open an inch or so to thread the elastic.
  • Thread the elastic through the casing, sew the elastic together, sew shut the opening in the casing.


Feb 14, 2012

Valentine's Day Pop-Up Card {Tutorial}


I saw this sweet card on Pinterest and wanted to try my hand at recreating.  I started to click on the link to see if there were more detailed instructions, but the tab popped up with Chinese characters, so I just closed the browser down.  I was afraid it might be a virus.  I just used the illustration as shown, and dabbled till I got something close to what I wanted.

Here's what I did:

Open a new Word document.  Using Arial Black font, size 130, I typed "U" and "I".  Place cursor between U and I.  Type the U before I because you'll be cutting it from the back.
Step 1
To make the heart, go to Insert > Picture > AutoShapes > Basic Shapes (the button with the square, heart and triangle) > Heart Shape.
Step 3

In the drawing box that appears, just click and drag your cursor till you get a nice size heart shape.
Step 4

Crop the drawing box to tightly fit around the heart by grabbing the dark corners and sides of the drawing box. The box should settle itself nicely between the U and I.  The height of the heart should be 1.28" and width works well at 1.45"--format the heart by right-clicking withing the drawing box.
Step 4
For cutting, we just need the outline of the letters, so go to Edit > Select All.
Now go to Format > Font.  Click the "Outline" box.  Click  OK.
Step 6

Print page. Print on the back side of the paper.  I chose one of Grace's numerous works of art to print it on.

Employ your inner artist and draw the sides of the heart out so that each side touches the U and I.  Once cut, the heart will only be attached at the sides. Free-hand a smaller heart within your new heart shape.

Using a ruler, draw a line 3/8" above the top of the letters.  With the ruler, extend the top of the U and  I to meet the line.

Using the diagram pictured here, use an X-acto or very sharp utility knife to cut on every straight line, and fold on every dotted line. Note the bottom of the U and I are not cut, but folded. Be sure to protect your work surface from being cut through.  I just used a thick newspaper. 

Fold the letters first, then fold the card.  The card is folded in half at the point 3/8" higher than the bottom of the letters, along the straight cut around the heart.

 Cut the card to your desired dimensions.

Glue the back to a contrasting sheet of stock paper, being careful not to get glue on the letters.

This post is linked to Tute Tuesday and Tuesday Talent Show.

Feb 9, 2012

Valentine's Wreath


Ben says it looks *insert disgusted face*.  I wanted a little something fun for Valentine's Day.  To make this, I wrapped a straw wreath form with strips of quilt batting, then wrapped that with chenille yarn.  (I scored a whole skein for $.50 at a Michael's craft store that was moving and everything was 70% off!)  I made a few felt flowers, stuffed a few fabric hearts, and added a t-shirt flower I already had.  Everything is fastened on using safety pins.  The bow is made from ribbon I had leftover from my wedding. (Was that really 6-1/2 years ago?)

I didn't buy anything for this project specifically, so a homemade project for nothing!  My kind of decorating.

Feb 3, 2012

Child's Cardigan Tutorial {Upcycled Sweater}

I picked up this eyelet cardigan at a garage sale last summer for a buck.  It had a small rust stain on the shoulder, but I thought maybe I could dye it or just bum around the house in it.  But I just never really liked the way it lay--too boxy.  I've been purging the house lately, so I decided to get rid of it.  Then I thought that Grace sure could use a white cardigan, and this upcycled cardigan was born.

The original jersey knit sweater.

First, I cut off the sleeves.

Next, I used a shirt that fit Grace nicely to trace the bodice for the cardigan.  I added an extra 5/8" or so for seam allowances.

I then cut along the red pen lines.

My draftsmen.

First, I sewed the shoulders together.

*I failed to take a picture of cutting down the sleeves, but I cut the sleeves apart, laid them flat on top of on another.  I then cut them about 12 inches long with a gentle slope at the top, about two inches longer than the sides.  I determined the width of the sleeves by measuring the width of the arm openings in the bodice.  I determined the wrist size of the sleeve by measuring a long-sleeved shirt that fits well, and adding an 1-1/2" for ease and seam allowance.  I drew a line from the edge of the shoulder to the wrist to achieve a slightly tapered sleeve.

I pinned the re-cut sleeves at the shoulder.

I sewed the shoulders to the bodice.

I hemmed the sleeve at the wrist by folding it under and sewing.  The beauty of knit is that it doesn't ravel.

I pinned the sleeve seams and the side seams, and sewed them in one continuous seam.


 All done!  Grace wanted it long, or I would have hemmed the bottom of the cardigan too.  This was a pretty quick project.  I'd say about 2 hours maximum time, and the cost -- FREE!

Dec 13, 2011

Homemade Holiday Potpourri


I've been simmering this simple potpourri on my stovetop for a couple weeks now.  It reminds me of wassail  and cinnamon rolls.  It gets me all nostalgic and Christmas-y.  It's a happy smell.

Homemade Holiday House Spice
Ingredients:
Peel of a citrus fruit (I've been using the clementine peels we've been eating!)
Cinnamon stick or tsp. of ground cinnamon
5-6 whole cloves or tsp. of ground cloves

Directions: Add ingredients to a small saucepan of water, place over lowest stove setting or in crockpot.  I use a warming zone on my stove.  Keep an eye on it, and refill water when it begins to evaporates.

Be sure to warn husband before he gets home, so he doesn't salivate and ask where the cinnamon rolls are when he steps in the door.  Seriously.  My husband thought I was baking up something delicious the first time I made this.

Do certain smells remind you of people and places?  Every time I smell White Rain hairspray I think of a former pastor's wife.  A certain potpourri (not this one!) brings back a flood of memories from a childhood home.  What scents trigger memories for you?  

Dec 2, 2011

Something Fun Friday {Bath Paint}

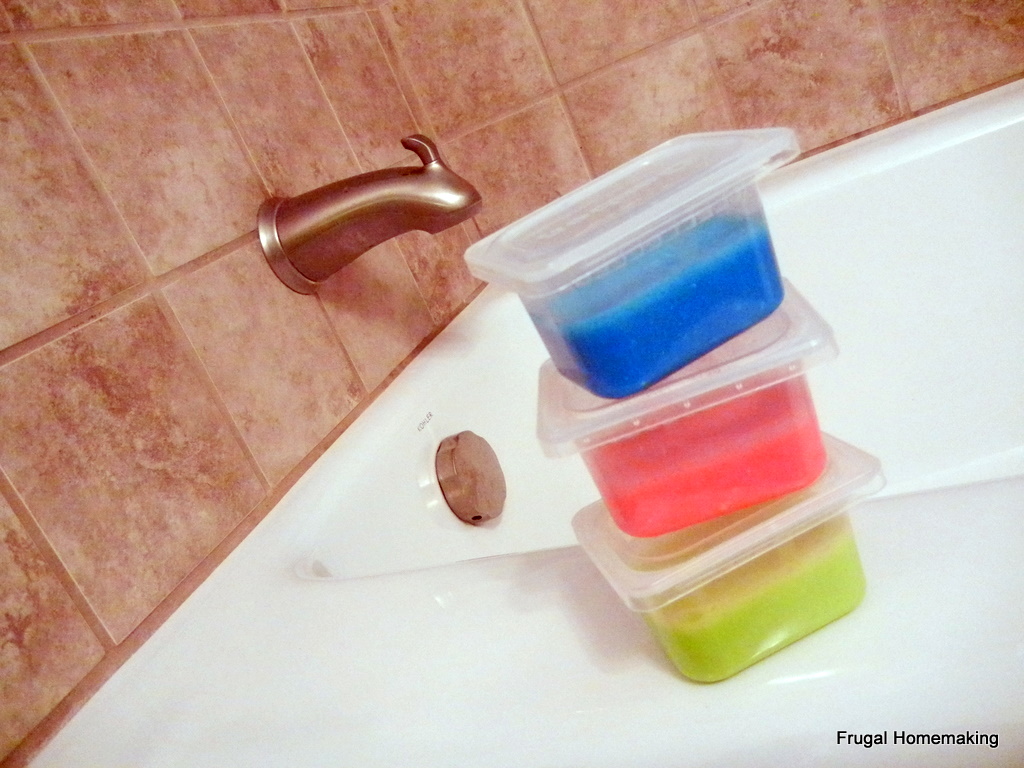
The girls had a blast with this bath paint that I mixed up for them.  I gave them a couple pastry brushes, (What? It's all I had!) and they painted the tub and themselves for half an hour of giggly fun.


Tear-Free Bath Paint
Supplies:
1 cup clear tear free soap (I used Johnson's)
2 Tbsp. cornstarch
Food coloring, 3-4 drops
Small containers with lids (I used baby food tubs)

Directions: Mix soap and cornstarch with a whisk until cornstarch is completely dissolved.  Separate soap into containers and add food coloring.  Give your kids a paintbrush, and let them clean your bathroom!

Note: The pink gave Leah a rosy face, actually her forehead, so rinse sooner than later.

Nov 11, 2011

Something Fun Friday {Hand Tree}


This doesn't require much explanation.  I traced her hand, but Grace colored the tree and cut a good bit of the "leaves".  I poured a gob of glue on a piece of paper, and then showed her how to lightly dab the paper pieces with the glue. I also gave her a damp paper towel to wipe her hands periodically.

Jul 14, 2011

Stop...and Let Me Tell You! {Railroad Stop Light}

This is not my handiwork...it's Ben's.  He made this as an object lesson for the children who ride the Sunday School bus.  He spent about 5 hours or so on it, and I was amazed at how real it looks.  The light is made entirely from cardboard, masking tape and spray paint.  The base is made from a 2x4 that he ripped on his table saw and some scrap wood.
 He did make one obvious mistake from the real thing.  Can you figure it out?!  He had to tell me because I'm really bright and all that.

Jul 11, 2011

Tight Turtleneck to Comfy Dress

 During one of those "Oh, I'm sure it'll fit--it's a large!" moments, I bought this turtleneck from Target.  Well, it's one of those clingy shirts, but I love the soft feel of the knit, so I was loath to give it away.
 I figured I'd try my hand at sewing on knits with something that was relegated to the thrift bin anyway.
 Using another dress as a pattern, I cut out a dress.
 There are 2 of these, as I cut both the front and back of the shirt at the same time.
 My sidekick was right there to assist me.
 See?  Didn't she do a good job?
 I thought the dress might look too much like pajamas without a defined waistline, so I cut a piece of elasticized lace that I got from a thrift store at $.10/yd. I sewed it across the front like an empire waist, and I also sewed two ties into the side seams so it could be tied in back. I then sewed up the shoulders and side seams with the right sides together.
I tried it on Grace and decided it needed sleeves.  So I took the original sleeves and figured I could do something.
 I cut the sleeves at the cuff so I didn't have to finish the sleeves.  I cut the sleeves free-handed, just eyeballing the angle.  I basted a gathering stitch, then pinned the sleeves in place and sewed.

Next, I cut 1/4" slits in the neck hole, then folded the fabric down 1/2" and sewed the collar seam.  I did three rows of the neck stitching, but two would have been fine.
 
I love the simplicity of this dress, and Grace wants to wear it all day, all night because it is so comfortable.
It took me 2-1/2 hours at most, and this was the first time I had sewn with knits or made a dress completely pattern-less.  I'm not sure what I was afraid of, because it was so easy.  I just needed to adjust my thread tension a little to between 2 and 3.
Upcycled any clothes items lately?  I'd love to see other ideas!

Jul 2, 2011

Scrappy July 4th Skirt

Two years ago, I made our family matching Independence Day outfits.  Leah fits Grace's jumper perfectly, and I had just a few longer scraps of the material left, so I thought I'd try to make a skirt for Grace so we could all have matching outfits now that there are four of us.


 I measured Grace's hips and added an 1" for seam allowance for the top strip.  The middle strip is 1-1/2 times as long as the top strip, and the bottom strip is 1-1/2 times as long as the middle strip.  The top strip is 20" long x 4" wide, the middle is 30" x 5", and the bottom is 45" x 6".  I sewed a basting stitch at the top of the bottom strip, then gathered it till it was approximately 30" (the length of the middle strip). I sewed a basting stitch at the top of the middle strip, then gathered it till it measured 20".


 I sewed the bottom strip to the middle strip.


 I sewed the middle to the top, then sewed the long seam closed.

 To make the waistband, I folded down and ironed the waist a 1/4", then folded and ironed down another 1".

 I sewed the waistband, then top-stitched along the top edge for a more finished look.

Voila!  I promise this took me no more than an hour.  Easy-peesy even for a simple sewer like myself.