Showing posts with label frugal living tips. Show all posts

Mar 28, 2013

Homemade Peppermint Honey Lip Balm

Did you know that your skin is the largest organ of the body?  And what you put on it is absorbed into the body-- in fact, many medicines today are available as skin patches for those who can't swallow pills or tolerate shots.

One thing I have been considering lately is the lotion, soaps, and moisturizers that I use on a regular basis.  Here's a tedious but well-documented article on the dangers of just one of the chemicals used regularly in toiletry products, sodium lauryl sulfate or SLS.  While I'm not ready to turn all-out crunchy anytime soon, it's a little hard to deny that there may be some wisdom in avoiding it when possible.

Have your tins all ready for pouring before you begin the melting process.  The balm hardens quickly.

I was super excited about making my own lip balm.  I actually volunteered to make it as a favor for our church's ladies retreat back in November.  I had all of the supplies on hand, excepting the salve tins, so it was way inexpensive.  If you don't have the supplies on hand, the beeswax is probaby the most difficult to find, but you can order some from eBay very reasonably.  The honey, coconut oil and lanolin (find it in the baby aisle!) are available at most grocery stores, and the peppermint oil is available at a craft store like Hobby Lobby with the candy-making supplies.


Plop the coconut oil, lanolin and beeswax in the top pan of a double boiler, or if you're like me, just rest an oven-safe bowl (preferably with a pour spout) on top of a smallish pot with a bit of simmering water in it.


Over a medium-low heat, melt it all down.


The beeswax will be the last to melt and incorporate.  Because the mixture is a little messy to clean up, I recommend using something small and simple to clean, like the handle end of a wooden spoon.


All melted!


Quickly add the honey and peppermint oil, whisking constantly, and begin to pour into your containers as soon as it is incorporated.  The honey does not mix well with the oils, so I had to stir constantly while pouring into the tins.  If you have two people, this step may be a little easier.  I didn't get any pictures of this step, because I needed both hands.

All done!


Peppermint Honey Lip Balm
7 tbsp. coconut oil
1 tbsp. lanolin
3 tbsp. beeswax
1-1/2 tbsp. honey
30 drops peppermint essential oil

Melt the coconut oil, lanolin, and beeswax over low-medium heat in a double boiler. Once melted, remove from heat and quickly add the honey and peppermint oil and stir until incorporated.  Immediately pour into tins.

The stats:
Time: 15-20 minutes
Cost: about $.88 per tin
Yield: 12-15 tins (probably about 1 oz. tins)

Sep 26, 2012

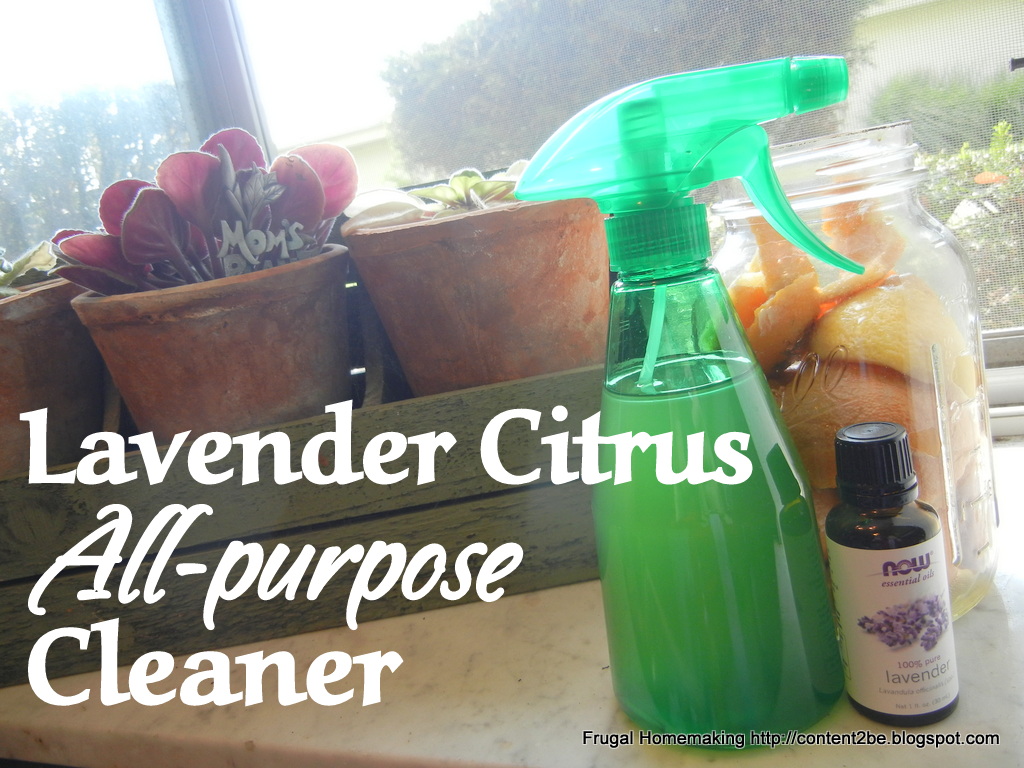
DIY: Lavender Citrus All-Purpose Cleaner


So, I posted last about making your own citrus vinegar.  While this alone can be used as a fab household cleaner, I added a few additional ingredients to up the pizzazz of this natural cleaner.


The Cast: 
Dawn (or your favorite dish soap), citrus vinegar,  additional white vinegar, 70% solution isopropyl rubbing alcohol (find it in the first aid aisle), essential oil, water.

  • Dawn--a surfactant--it lowers the surface tension of water allowing it to interact with oil/grease/grime pulling it away from its source
  • citrus vinegar and white vinegar--the acid content makes it a great all-around cleaning agent
  • rubbing alcohol--effective disinfectant and antiseptic; also dries quickly for a streak-free finish
  • tea tree essential oil--antifungal, antiviral, and antiseptic properties 
  • lavender essential oil--relaxing aromatherapy


 Now there are lots of different recipes out there for all-purpose cleaners, but be mindful of this one tip--if the recipe calls for baking soda and/or castile soap AND vinegar, just click away.  The reason is that baking soda and castile soap are bases, and vinegar is an acid, so combined they can react to create an awful oily mess and leave you with a non-cleaning solution.  Check out Dr. Bronner's article (of the famed all-natural castile soap) on  how mixing an acid and a base cancels the effectiveness of both.

Here's what I did:

I strained the citrus vinegar through a coffee filter to remove any citrus pulp that might clog the spray pump.


I mixed the citrus vinegar, additional white vinegar, rubbing alcohol, Dawn, and the essential oil.  Looking at this picture, you can imagine my dismay to see oil sitting on top of my cleaning solution.  I didn't consider the fact that essential oil is indeed oil, therefore it isn't soluble in water. I blame it on pregnancy brain--might as well use the excuse while I have it!  I give the bottle a good shake before each use, and I haven't noticed any oily residue; I presume the proportion of oil is too small to have any effect.

So here's what I think of this cleaning solution.  I LOVE IT!  Honestly, the first time I used it, I wasn't sure if I liked it.  I think the solution needed to meld a little bit, because the next day I used it again, and I thought it did a fantastic job.  Besides the fact that it does the job, it is a safe product to use around your children and here's the clincher: it smells divine. I kid you not; sometimes I spray the counters just to smell this stuff.  Not a chemical clean smell, a fresh, natural clean smell.

I've used it on my countertops, appliances, carpet (please don't ask), tabletop, walls, glass, and mirrors with equally impressive results.


Lavender Citrus All-Purpose Cleaner
2 cups water
1-1/2 cups citrus vinegar
1/2 cup white vinegar
1/2 cup 70% solution isopropyl rubbing alcohol (helps to leave surfaces disinfected and streak-free)
4 drops Dawn dish soap
7 drops tea tree oil (natural disinfectant; find in the antiseptic aisle or at a natural/health food store)
10 drops lavender oil (find at a natural/health food store)

Mix it all together in a spray bottle. This makes a little more than a quart (36 oz.), so store any extra for refilling your spray bottle.  I have mine under the sink in a canning jar. Shake well before each use.

Sep 24, 2012

DIY: Citrus Vinegar

In my love of all things cheap, I recently did a little research into making homemade cleaners.  One common ingredient in nearly every recipe I encountered was vinegar.  Vinegar is basically fruit or grain starch that has fermented into an acid, particularly acetic acid.  Commercially produced vinegar is 5% acetic acid.  As an acid, vinegar has great cleansing properties, while still being all-natural and safe for the entire family, as well as the environment.  If your little Houdini gets into this cleaning product, she can guzzle away. 

According to the Vinegar Works Wonders site, vinegar has been prized for generations for its usefulness as a stain remover, mildew eliminator, soap scum dissolver, chrome polisher, lime descaler, fabric softener, room deodorizer and as an unclogging agent.  Here is an actual lab study comparing the effectiveness of six alternative (natural) cleaners to commercial cleaners.  Vinegar definitely holds it own.

While that makes it a great all-in-one natural cleaner, I personally find vinegar obnoxiously pungent, so I did a little research...ya know, googled "mask vinegar smell" and came up with this lovely project.


This is super simple, but I was very pleased with the end product.
  • Save your lemon and orange rinds in the refrigerator for a couple days until you have enough to loosely fill a quart canning jar (more or less depending on how much you want to make!)  
  • Fill clean jar with rinds.
  • Add white vinegar to completely fill quart jar.
  • Secure jar with metal lid and ring or plastic lid.
  • Shake daily for two weeks. Don't worry about refrigerating--the acid content prohibits spoilage or mold growth.
  • After two weeks, the vinegar will be citrus-infused.  Remove and discard the rinds.
  • The pungency will be replaced with a sweet citrus odor.  Use in your favorite all-purpose cleaner recipe (got one coming up soon)! 
I thought you might enjoy this outtake...


Aug 24, 2012

Rag Curls and a Wedding

Many moons ago, my mother used to put sponge curlers in my hair.  This treat was reserved for special occasions like Easter or Christmas, and I recall the intense delight and satisfaction with which I viewed my Shirley Temple-esque reflection in the mirror. I do not remember being the least bit bothered by the hard plastic jabbing my head all night, but I have always been a bit vain, so apparently I considered it unworthy of thought even then.

The girls were privileged to participate as flower girls last week in Ben's brother's wedding.  They were so excited to wear their princess dresses and shiny pink shoes.  I figured a wedding would be a fun occasion to relive the pleasures of my youth, so I decided to curl Grace's hair.  I didn't have any sponge curlers, but I remembered that ladies used to make curls with rags in the pre-curling iron days.  I came across the YouTube video below, and gave it a shot.  Baby wipes are easy to come by in our house, so this was a fabulous discovery.


Here's our photo journey:

 Grace has been insisting on making the oddest faces lately during pictures.  
The tongue-in-cheek look is a particular favorite.


 All rolled up and ready for bed.


 In the morning.


Fresh curls. Another lovely face.  
Thankfully she didn't try these faces on the wedding photographer.


5 hours later at the wedding.  I carefully combed out each curl separately so that the ringlets would stay intact.  I didn't want her to have a 'fro.


A few tips:

  • Start with barely damp wipes. Let the wipes sit out for a little while and dry out.  I used them first on my hair to experiment, and my hair was soaked from the wipes.  I used the same wipes to do Grace's hair later that evening, and the moisture content was perfect.
  • Start with dry hair; the moist wipes are all the moisture you need.
  • Use small sections of hair.  I needed 13 wipes to wrap Grace's entire head of hair.
  • You can re-use the wipes.  Just mist with water when ready to reuse.


Jul 27, 2012

Big Batch Blueberry Muffins {Fill Your Freezer!}

If you pack breakfasts for children or a spouse, or your family is frequently on the go, then you're gonna love this mega-batch muffin recipe!  I have been packing my husband's breakfast and lunch for 7 years now, and honestly, I like it no more now than I did 7 years ago.  I have, however, learned a few tricks and tips to make the meal assembly a little snappier.  One of those tricks is freezing big batches of muffins for breakfast. I then bag them by twos in sandwich bags and store them all in large gallon size Ziploc bags in the freezer.
The thing that I love most about this recipe is that almost all of the ingredient's measurements are in full cups and teaspoons, so just a couple utensils gets used for the entire recipe!


For about the first 4 years of our marriage, Ben took a package of  Pop-tarts for breakfast every weekday.   After a series of intense number crunching, I deduced that he could eat a more healthful (and tastier, in my opinion) breakfast and I could save a sizable bit of change by baking muffins for him to take instead.  So over the past three years I have done a LOT of baking, to the tune of about 1500 muffins!

Blueberry muffins are awesome, but unless you buy blueberries in season, they are too pricey.  My strategy:  Aldi has a $.99 cent/pint sale every July.  I buy a bunch, like 15-20 pints, then pour them straight from the pint into a resealable sandwich bag.  I freeze them, then throw the sandwich bags into gallon-size freezer bags for manageability.  When I want to make a batch, I pull them out, rinse them clean in cold water in a colander, and toss them still frozen into my muffin batter.

Sift together the flour, sugar, baking powder, and salt.


Combine the oil, milk, and beaten eggs in a separate bowl.

Add the egg mixture to the dry ingredients and stir just until moistened and batter is still lumpy.  Gently fold in the blueberries.

Spoon into muffin cups until about three-quarters full.  Bake at 400 degrees for 18 minutes.


Big Batch Blueberry Muffins
Makes 42-48 muffins

Ingredients:
7 cups flour
2 cups sugar
1/4 cup baking powder (or 12 teaspoons!)
2 teaspoons salt
4 beaten eggs
3 cups milk
1 cup oil
4 cups blueberries, fresh or frozen

Directions: 
Line muffin tins with baking cups.  Preheat oven to 400 degrees.  In a large bowl, combine dry ingredients: flour, sugar, baking powder, and salt.  In a medium size bowl, beat eggs.  Add milk and oil to beaten eggs, and stir to combine.  Pour egg mixture into flour mixture and stir just until moistened.  Gently fold in the blueberries. Spoon batter into lined muffin cups until 3/4 full.  Bake at 400 degrees for 18 minutes or until edges are golden.  Remove from oven and let muffins cool for 5 minutes before removing from tins.

Real Deal: about $5.10 for the entire batch or approximately $.11 per muffin (based on 48 muffins)

Jun 9, 2012

Things I Loved This Week


What things got you excited, made you laugh, or got your attention this week?  Here's a few from mine.
  • This delicious-looking, low-carb pizza made with a cream cheese/egg crust made me salivate.
  • DIY Burt's Bees Lip Balm Recipe --definitely something I'm interested in trying.  At $2+ per stick, this alternative would be much cheaper and a fabulous gift!
  • I pondered the possibility of making a small batch of homemade soap in my regular blender. So I googled "blender soap" to see what other original minds have done.  And I found Cole Brother's Soap complete with step-by-step instructions and recipes.  Super excited.

 **************************************************
And for a little lightheartedness, one of my daily moments as mom.  Grace and I had the following conversation as I helped her wipe up in the bathroom...

Grace: "Mom, you're wasting the toilet paper."
Me: "No, I'm not. Why do you think that? You are not the judge of those things."
Grace: "Mom, did you say judge? The Bible says you are not supposed to judge. That's bad.  Leah, did you hear Mama?" She shook her head in shock and disbelief.

I guess she is catching something from those sermons in church....

May 2, 2012

Tip to Remove Permanent Marker From Clothes

The other day Grace was coloring with Sharpies, and she accidentally marked her shirt.  I remembered reading a tip on Pinterest about getting permanent marker out of just about everything.  I couldn't remember where, so I googled it and found this amazingly comprehensive list!

Shhhhh! Here's the secret.
  • Work on it as soon as possible
  • Hand Sanitizer (aka ethyl alcohol) rubbed in and rinsed out, repeatedly

We have a monster-size bottle of hand sanitizer that I bought as a refill for Ben in his truck.  Honestly, I was a bit skeptical, but I hated to pitch a white turtleneck that Grace had worn only a handful of times.  Silly me, I let it sit for about 6 hours before I attempted to remove it.  I'm confident I could have completely removed it if I had treated it right away.

Before:


 After about 15 minutes:

 After about 20 minutes of scrub, rinse, and repeat, I washed and dried the turtleneck:

Pretty impressive, eh?!  I thought so.  What's your secret to removing crayon, permanent marker, or your budding artist's favorite medium?

Apr 13, 2012

Meal Monotony and Why I Love It

Mommy confession: I feed my children the same things every day for breakfast and lunch.  Every morning, my girls eat a bowl of Multi-grain or plain Cheerios and milk.  Every afternoon, they eat a peanut butter and jelly sandwich with pretzels and fruit.  Occasionally, as in once every two weeks or so, I pull out English muffins or yogurt for breakfast, or the girls will eat leftover whole wheat spaghetti with butter and Parmesan cheese for lunch.  Meal monotony has saved me time, money, and headache.

It didn't used to be that way.  As a new mom,  I read other blogs and talked to others about what they did at meal time. I thought up (what I thought were) exciting, nutritious breakfast and lunch combinations.  I tried doing leftovers for lunch. Either way, those meals were greeted with whining--a habit we try not to welcome in our home. I was frustrated.   I attempted the idea of offering a choice at breakfast or lunch to alleviate conflict.  It wasn't working.

Finally, out of desperation, I just started giving them one option.  The same option. Every day.  I didn't argue.  I just stated, "This is what's for lunch." Within a few days, the meal time dilemma was solved.  There was no question in the girls' minds what we would be eating, and as a result, they never whined about not having such or thus.  We have followed this routine for nearly 6 months, and to my amazement, they never complain, and they actually look forward to cereal and PBJ sandwiches.


Let me just say, this is what works for us.  I know full well that what works for us may not fit for your family.  But maybe if you're frustrated like I was, this is the solution.  As a result of this change, I never sit there in a half-sleep state wondering what to fix for breakfast.  The shopping list is simpler because I know what I need and when to buy it.  I don't debate with the girls or cajole them to "try it, you'll like it."  My girls are content with what I offer them.  On the other hand, dinner time is our variety show, and provides the opportunity to try new flavors and textures and step outside our comfort zone.  Cereal and sandwiches are simple and quick to fix.  Using coupons with sales, I have yet to pay over $1 per box of cereal, and I'm still using up my horde of free peanut butter from last year, so it's cheap.  And I will not allow myself to feel bad when I see what creative solutions others may have found, because this is our family and our solution. Can I hear an AMEN?

Apr 3, 2012

No Shampoo Saga {Part 2}

So for all of you on the edge of your seats, here's the rest of the story about my 'no shampoo' experience.  If you didn't catch the first post, you can should read all about the whys and wherefores first.

Sometime around the middle of week 5, my hair started feeling very wonky.  Have you ever forgotten to wash the shampoo or conditioner out of your hair?  That's how it felt.  I couldn't even run my fingers through it.  The first time it happened, I actually thought that I had forgotten to rinse out the baking soda, so I hopped back in the shower and re-washed it.  Alas.  Still nasty-o.

After some pondering, I then theorized that I had gotten the ratio wrong in the baking soda solution, so I threw out the batch and remade it, paying very close attention to the measurements.  Re-wash that evening.  Slightly better.  The next day I washed it again because the heavy, dirty feeling was getting to me.  It got worse.  Shiver. Not cool at all.

For the sake of my word, (I mean, I had just said I was gonna stick it out 2 months, right?) I endured 3 more days of yuckiness. On Saturday night, I couldn't take it anymore.  I washed it with Dove shampoo.  Ahhh. More like normal.

My final analysis:  On a positive note, prior to week five, my hair did seem to be adjusting nicely to a two washes/week schedule.  Having gone back to regular shampoo, I realize now that my hair also had developed some incredible volume comparatively speaking.  It did hold curl better.  On the negative side, the baking soda seemed to dry out my ends, but using apple cider vinegar seemed to only make my hair greasy.  I also could not go to sleep/lay on my hair while it was wet or it would look greasy.  My hair had no shine. It tended to be dull and a bit lifeless.  Not exactly the look I'd like to sport.  And finally, the horror of week 5 nailed the coffin shut on my no shampoo experience.

But hey, who am I to say it won't work for you?  My current hair care regimen: Free or super cheap shampoo/conditioner purchased by combining a sale and coupons.  I wash using just a dime-sized portion of shampoo, rinse and repeat.  Add a daub of conditioner to the ends and rinse out.  Sha-zam.


Feb 22, 2012

No Shampoo Saga {My Experience}

I'm a little nervous about this post.  It's a little weird, which may lead you to think that I'm a little weird.  Which may be true, but I may not want you to know that.  Read at your own risk, m'kay?  Thanks.

Ever heard of the "no shampoo" hair care alternative?  The first time I heard about it was on a crunchy, all-natural forum.  I rolled my eyes at the time, but now it has become a rather trendy movement.  I am by no means completely sold on the all-natural, organic movement, but this idea intrigues me.  The basic gist is that you quit washing your hair with commercial shampoos and conditioners, and you use a basic wash of dissolved baking soda with a rinse of diluted apple cider vinegar.

So I'm giving it a trial run. To be honest, I am not unhappy with my hair, I am just plain curious.  So January 27 was my last shower experience with shampoo. After three weeks, here's my research, opinion, and experience.

Why on earth would someone follow a no-shampoo hair regimen to begin with?  From what I could tell, it came down to these three basics:
  1. To reduce exposure to harmful chemicals in hair products. ( Shampoos and conditioners generally have an ingredient called sodium laureth sulfate, sometimes shortened to SLS.  This chemical is easily absorbed through the skin and eyes, can store in quantity within organs, and can combine with nitrates that are present in the detergent as well, to create a potent carcinogen.)
  2. To save money. (A box of baking soda costs $.38 and would last a decade or two.)
  3. To restore the natural pH of their hair, as well as balance oil production from scalp glands.  (Shampoo is actually a detergent that strips all oils from the scalp and hair, disrupting and speeding up the natural production of oil, which acts as a natural barrier and moisturizer.)
Every post I have read guaranteed that there would a transition period from a week to up to 6 months.  Since I stay home every day, I figured transition wouldn't be bad.  Nobody but my husband, the occasional neighbor, and sometimes the mailman to scare off. The first week was rough, as I tried to figure out how to actually wash my hair with baking soda.  I finally discovered I wasn't using enough.  Once that was resolved, I determined to cut back on the number of times I actually washed my hair per week.  Right now, I wash my hair on Saturday and Tuesday.  I've always been an every day, or every other day kinda person.  The first time I went that long without washing my hair, it was not pretty.  Slick Willy to the max, my friends. 

It is getting better. I can't wait to wash my hair by Tuesday and Saturday, but I'm not a complete grease ball.  As far as hair texture goes, there hasn't been any perceptible change.  Many people comment that their hair has become very manageable and soft with reduction of frizz, hair that finally holds a curl and hairstyle well, and natural waves and curls that are more pronounced.  I haven't noticed any thing.  Yet.  They say you need to stick it out 2 months to see noticeable changes.  I'm giving it the full 2 months, and then I'll give my final analysis.

Here's my hair Monday afternoon--straight out of a pony tail.  I haven't washed it (with baking soda) since early Saturday morning.  Obviously, I couldn't be bothered with makeup today either...

My current regimen is 1 Tbsp. baking soda dissolved in 1 cup water.  I have it in a narrow opening squeeze bottle, so I just squeeze about 1/2 cup solution all over my head.  I scrub my scalp lightly with my fingers and massage my hair, then allow the solution to soak for a couple minutes before rinsing out.  That's it.  Some people recommend a diluted apple cider vinegar rinse for conditioning, but it made my hair greasy. 

Feb 21, 2012

Homemade Liquid Hand Soap {Tutorial}

I was super excited about trying this frugal recipe for homemade liquid hand soap after seeing a pin from The Farmer's Nest detailing how to make my own.

This project was super easy, hands-on time was minimal, and it cost a grand total of $1.50 for a whole gallon of  soap. 

Supplies you need:
bar of soap, glycerin, squirt of dishwashing liquid, water
I found glycerin in the first aid section at Wal-Mart.  This 6 oz. bottle cost $2.99, but I only used 1/6 of the bottle.

Set a gallon of water (16 cups) on the stovetop on medium heat. I recommend a non-coated pot, since you may use your mixing beaters later on; the beaters may scratch the non-stick coating.

Meanwhile, grate the soap.  I used my kitchen grater and bowl. It's just soap, right?  Excuse the scaly claw there; I'm not sure who that belongs to, but they may need to check out a recipe for homemade lotion. Just a thought.


 My helper decided this looked like fun, so she jumped in on the fun.


Once the bar is grated, stir the soap shavings into the gallon of water.


Add 2 Tbsp. (1 oz.) of glycerin to the soap mixture and a squirt of (hand) dishwashing liquid.  The dishwashing liquid is only added to enhance the suds factor.


Immediately after the ingredients have been added, the water will look cloudy and thin.  Now just put the lid on your pot, and allow the compound to marinate for 12-18 hours. 


I made mine around 3 p.m.  At 10 o'clock that night, it was still very watery, so I continued to let it sit.  By 9 o'clock the next morning, the mixture had thickened to a gel-like solid.

You may not need to, but I had to use a mixer to slowly add water until the consistency is similar to hand soap.  


Bottle it up!


Note: The kind of bar soap you begin with may affect your final result.  From what I've read, Dove seems to cause problems with thickening.  Also, the glycerin additive is a humectant that helps the skin draw the moisture in.  You may be able to get by without it completely.

Linked up to Frugal Friday.

Feb 15, 2012

Leftover Mashed Potato Chowder {cheesy veggie soup}

I fully intended to make this recipe this week, but then I realized I had a bunch of leftover mashed potatoes.  I wondered, "Hmmm...I wonder if I could use that as a substitute for a white sauce."


Well, I did, and it was a great way to use up a load of mashed potatoes.  I threw in some leftover crumbled sausage to satisfy the meat lover in our house.

Leftover Mashed Potato Soup
Serves 4-6

Ingredients:
1 Tbsp. butter
1/2 cup diced onions
1 cup carrots, finely shredded
2 cups water or chicken broth
2-3 cups mashed potatoes
16 oz. frozen broccoli
4 oz. bulk sausage or bacon, crumbled
1 tsp. salt
1/4 tsp. garlic powder
1-1/2 cups shredded cheddar cheese

Directions: Over medium heat, saute onions and garlic powder in melted butter.  Add shredded carrots and water and bring to a simmer.  Add mashed potatoes, stirring till potatoes are no longer clumped.  Use a potato masher to dissolve any clumps.  Add frozen broccoli and sausage and simmer 10 minutes.  Add salt and shredded cheese, stirring until cheese if fully incorporated. Serve with warm rolls.

Feb 3, 2012

Child's Cardigan Tutorial {Upcycled Sweater}

I picked up this eyelet cardigan at a garage sale last summer for a buck.  It had a small rust stain on the shoulder, but I thought maybe I could dye it or just bum around the house in it.  But I just never really liked the way it lay--too boxy.  I've been purging the house lately, so I decided to get rid of it.  Then I thought that Grace sure could use a white cardigan, and this upcycled cardigan was born.

The original jersey knit sweater.

First, I cut off the sleeves.

Next, I used a shirt that fit Grace nicely to trace the bodice for the cardigan.  I added an extra 5/8" or so for seam allowances.

I then cut along the red pen lines.

My draftsmen.

First, I sewed the shoulders together.

*I failed to take a picture of cutting down the sleeves, but I cut the sleeves apart, laid them flat on top of on another.  I then cut them about 12 inches long with a gentle slope at the top, about two inches longer than the sides.  I determined the width of the sleeves by measuring the width of the arm openings in the bodice.  I determined the wrist size of the sleeve by measuring a long-sleeved shirt that fits well, and adding an 1-1/2" for ease and seam allowance.  I drew a line from the edge of the shoulder to the wrist to achieve a slightly tapered sleeve.

I pinned the re-cut sleeves at the shoulder.

I sewed the shoulders to the bodice.

I hemmed the sleeve at the wrist by folding it under and sewing.  The beauty of knit is that it doesn't ravel.

I pinned the sleeve seams and the side seams, and sewed them in one continuous seam.


 All done!  Grace wanted it long, or I would have hemmed the bottom of the cardigan too.  This was a pretty quick project.  I'd say about 2 hours maximum time, and the cost -- FREE!